

One of our subscribers, Dennis from Australia, wrote to us telling us about the wire supports that he makes himself. We asked him to please send us instructions so we could share with all of you. He graciously did that, and we want to thank him very much for sharing.
Here it is now:
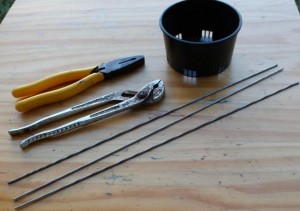
Photo 1
I make (for my own use) a plant stake which clips onto the pot rim to provide a solid support to tie tall plants i.e. Dendrobiums, larger Cats etc. It is made from 2mm – 2.5mm steel or aluminum wire which is twisted using a power drill, this makes flexible wire into rigid wire which supports the plant.
The orchid support can be made from small diameter wire (1mm – 1.5mm) for small miniatures to a larger diameter wire (2mm – 3mm) for large orchids. I prefer to work with 2mm wire, it is easy to bend which makes it easier on the wrists wh
en making a number of wire supports at one time.
WIRE ORCHID SUPPORT
Tools and Material: (Photo 1 – see above)
Galvanised fencing wire or Aluminium wire (2mm or 2.5mm wire)
Portable electric power drill
Engineers Vice
Pliers
Multi-Grips
- Clamp one end of the wire in the engineers vice and the other end into the electric power drill chuck. Tighten firmly (Wire normally cut into 2 metre lengths).
- Pull back on the drill to keep the wire taut before pulling the electric drill trigger, apply medium power.
- The power drill will twist the wire which will stiffen and straighten with every drill rotation. The twist in the wire can be seen in photo 1.
- Cut the stiffened wire into 400mm lengths.
- Grip the wire with the pliers, approximately 20mm from one end. Bend the wire back to form a small ‘U’ shape around the thin side of the pliers (See Photos 2 & 3).
- Bend the wire horizontal with the ‘U’ shape in the vertical position, and at a right angle to the ‘U’ shape (See Photo 4).
- Bend the wire into a larger ‘U’ shape around the wide side of the pliers (See Photo 5).
- Bend the wire back to form a 2nd small ‘U’ shape parallel to the 1st small ‘U’ shape (See Photo 6).
- Bend the wire back so the two ends face in opposite directions from each other (See Photo 7).
- Bend the other end of the wire over to eliminate the sharp edge (See Photo 8). This prevents an injury occurring when reaching over a greenhouse bench to pick up plants at the rear of the bench.
- The wire orchid support is finished (See Photo 9).
- Place the two small ‘U’ shapes over the pot edge with the larger ‘U’ shape on the outside of the pot (See Photo 10).
- Use the multi-grips to clamp the two small ‘U’ shapes onto the pot edge (See Photo 11).
- Bend the upright wire away from the pot edge to the desired angle to tie the back bulb or cane.
- The wire orchid supports can be removed from the pots and reused when re-potting.
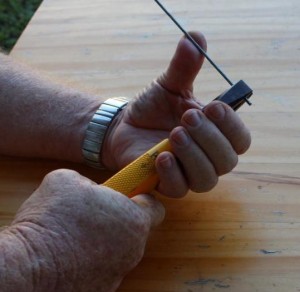
Photo 2
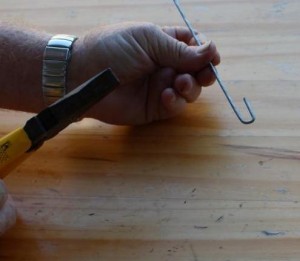
Photo 3
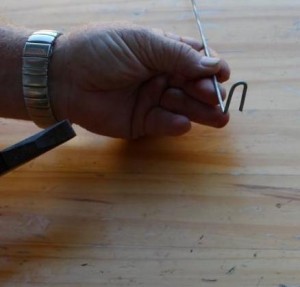
Photo 4
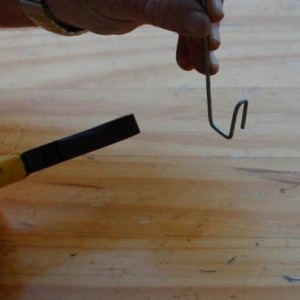
Photo 5
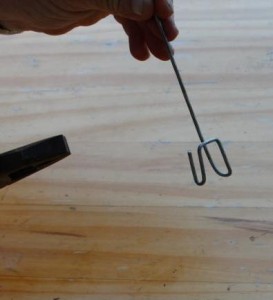
Photo 6
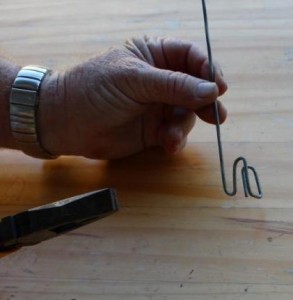
Photo 7
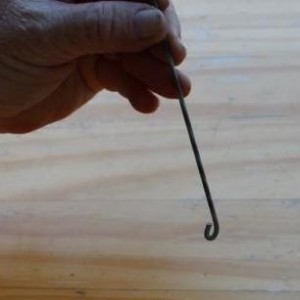
Photo 8
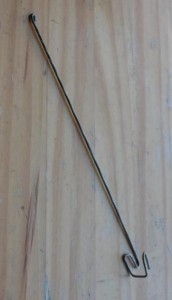
Photo 9
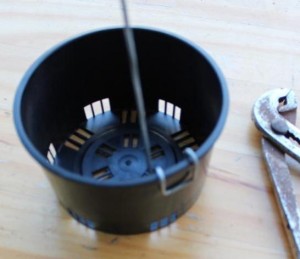
Photo 10
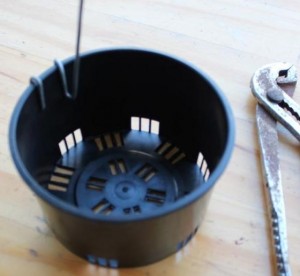
Photo 11
Do you have any really awesome homemade solutions for your orchids? Please leave a comment below and tell us about it! You may even get featured on our site!
For other supplies you need to grow orchids, please refer to our list of 9 necessary orchid supplies.


What Readers Are Saying